This is a slow experiment, but the results are really beautiful! It shows you how plants take up water through their system of veins. We recommend setting up the experiment in the morning and coming back to observe it every few hours during the day.
We are going to give you several versions on this experiment, ranging from very easy to a bit more challenging to set up – so you can decide how much time you want to spend on this. But the variations on these experiments is endless – take a few days, have some fun, and create your own multicoloured bouquets!
Catherine McLean is the captain of Team WEHI. She is not a scientist, but she coordinates the Blood Cells and Blood Cancer Division at WEHI. Everyone in the Division knows this experiment really well now, because she had variations on it running in her office for about three weeks back in 2019…
*Science is great fun! But please, always check with an adult before you start your experiment*
Experiment 1: The Blue Rose
Nobody has ever grown a blue rose in the wild… but you can make one in your kitchen!
You will need
- A white rose
- A jar, glass or vase
- Blue food colouring
- Water
Step 1:
Fill the jar or glass about 2/3 full with water, and add some blue food colouring.
Step 2:
Add the rose to the jar, and leave it for the day.
Step 3:
Come back in the evening – you will have a blue rose!
Tip: The more blue food colouring you add, the faster the rose will change colour, and the darker blue it will become! Why not try a rose race with three roses – or with three of another kind of white flower? Put a few drops of food colouring in one jar, ¼ teaspoon in the next jar, and a full teaspoon in the third jar, and see what happens!

Observe: The colour will appear in the veins of the petals first, but will spread to the rest of the petal over time, as the coloured water travels down the smaller capillaries.
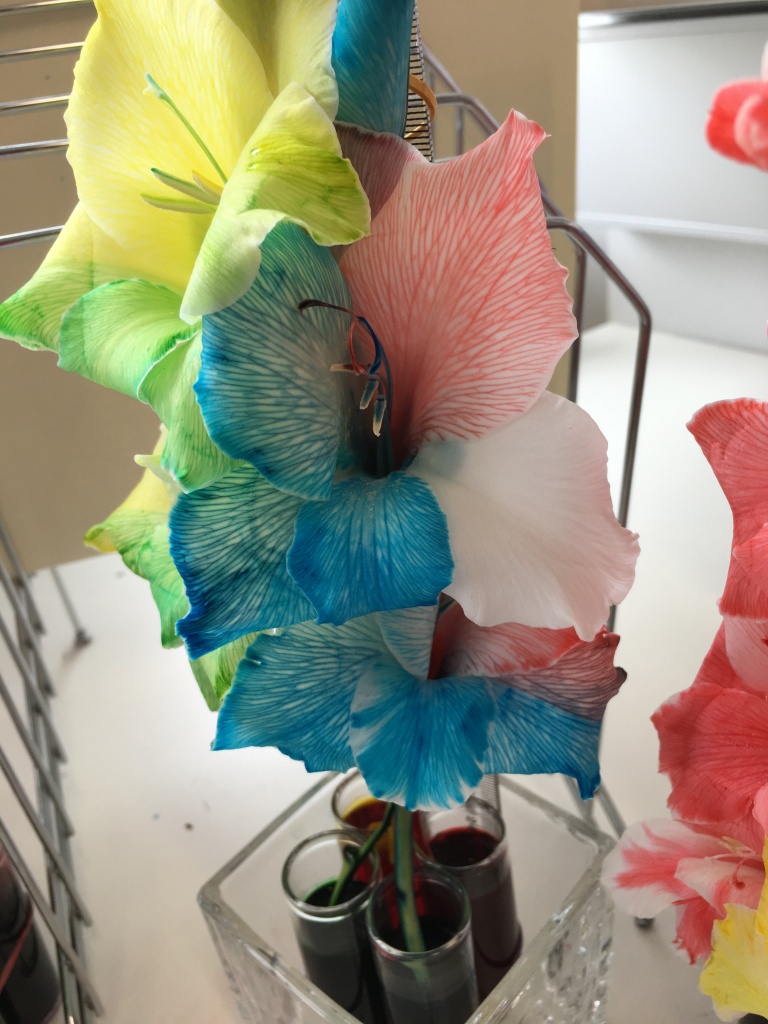
Experiment 2 – The Speedy Gladioli
Gladioli are very thirsty flowers and they take up colour fast. We loved this experiment, because you could see results within half an hour – sometimes even within minutes!
You will need
- A white gladiolus flower
- Two jars or narrow containers that can sit snugly side by side
- A rubber band or a box just slightly larger than the containers, to hold them together
- Water
- Two contrasting colours of food colouring
- Scissors or a Stanley knife
- A ruler or skewers
- String
Step 1:
Fill each container about 2/3 full with water, and add ¼ tsp of food colouring to each container. Use a rubber band to join the two containers together, or place them in a slightly larger container that will hold them side by side.
Step 2:
Use the scissors or the Stanley knife to split the stem of the gladiolus in two for about 10 cm. You may need to trim the gladiolus for this to work.
Step 3:
Carefully lower the gladiolus stem into the water, with one side of the split going into each jar. You may need to top up the water or split the stem a little further to make sure that the stem is properly submerged in the coloured water.
Use the string and the ruler to prop up the gladiolus flower. It will want to fall over, so you may find it simplest to prop the entire arrangement against a wall when you are done!
Step 4:
Leave for half an hour and see what happens!


Observe: Some gladioli will turn one colour, and some will turn the other. Can you see a pattern?
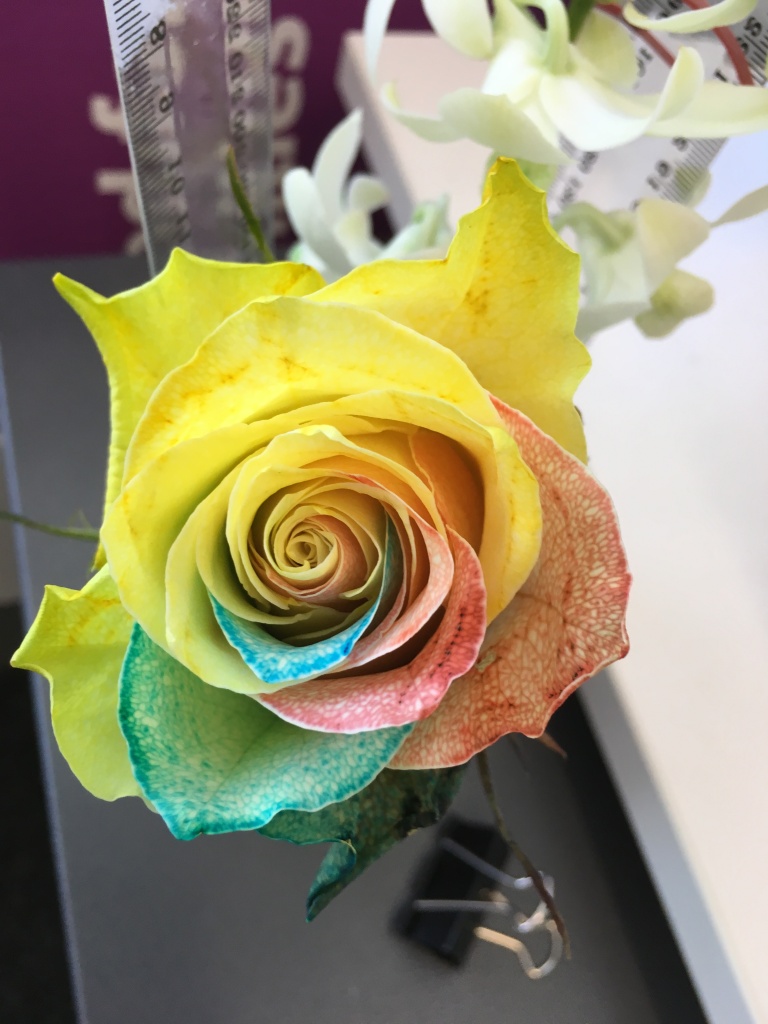
Experiment 3 – The Rainbow Flower
This one is fiddly to set up, but worth it!
You will need
- A white chrysanthemum, gerbera or rose
- Four test tubes, or narrow containers that can fit snugly together
- A rubber band, or a box that will hold the containers snugly
- Water
- Red, Yellow, Green and Blue food colouring
- Scissors or a Stanley knife
- A ruler or skewers to act as a stake
- String
Step 1:
Fill each container about 2/3 full with water, and add ¼ tsp of food colouring to each container. Use a rubber band to join the four containers together, or place them in a slightly larger container that will hold them in a tight square.
Step 2:
Use the scissors or the Stanley knife to split the stem of the flower in four for about 15 cm. You may need to trim the flower for this to work.
Carefully lower the stem of the flower into the water, with one side of the split going into each jar. You may need to top up the water or split the stem a little further to make sure that the stem is properly submerged in the coloured water.
Step 3:
Use the string and the ruler or skewers to prop up the flower. Getting the flower to balance and stay upright is the hardest part of the experiment, and you may need to prop the arrangement up against something.
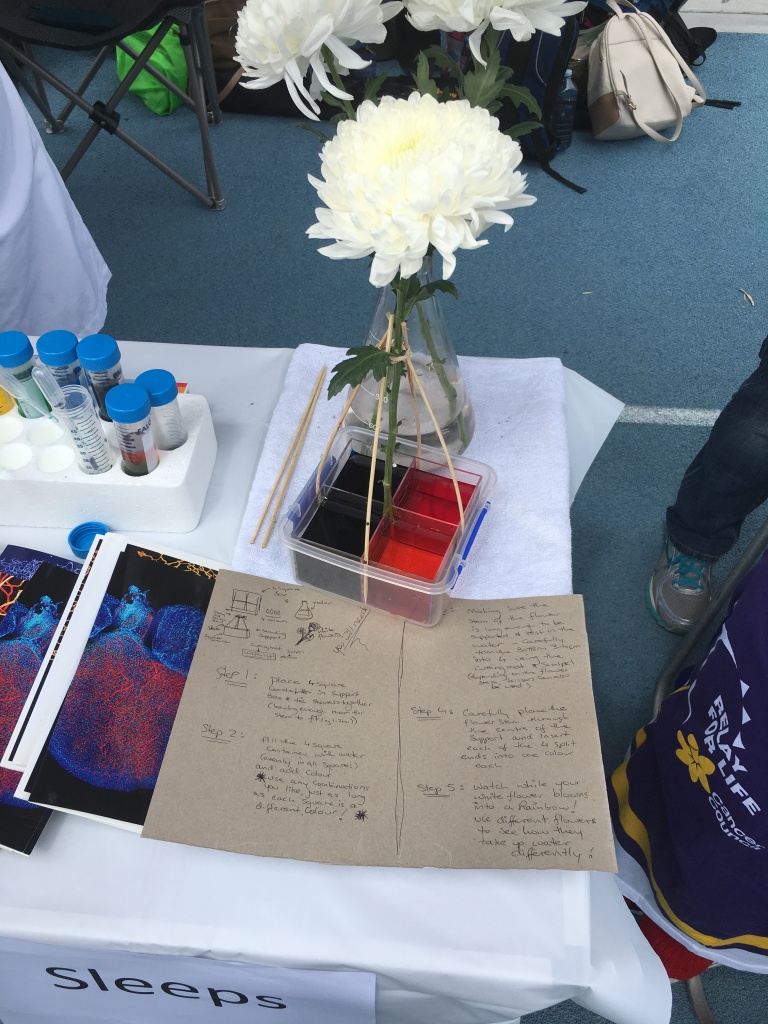
Step 4:
Come back at the end of the day and see how your flower looks!

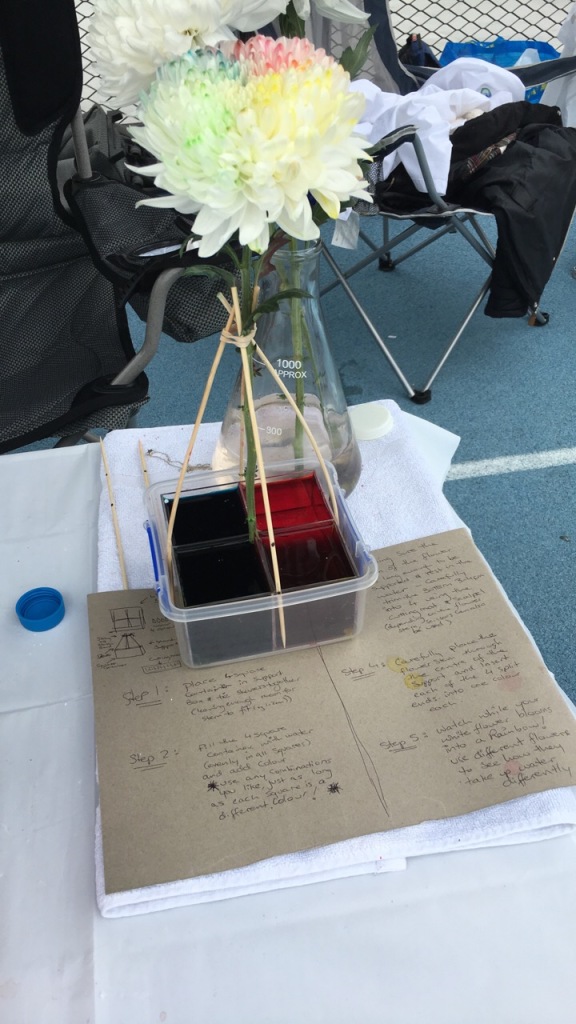

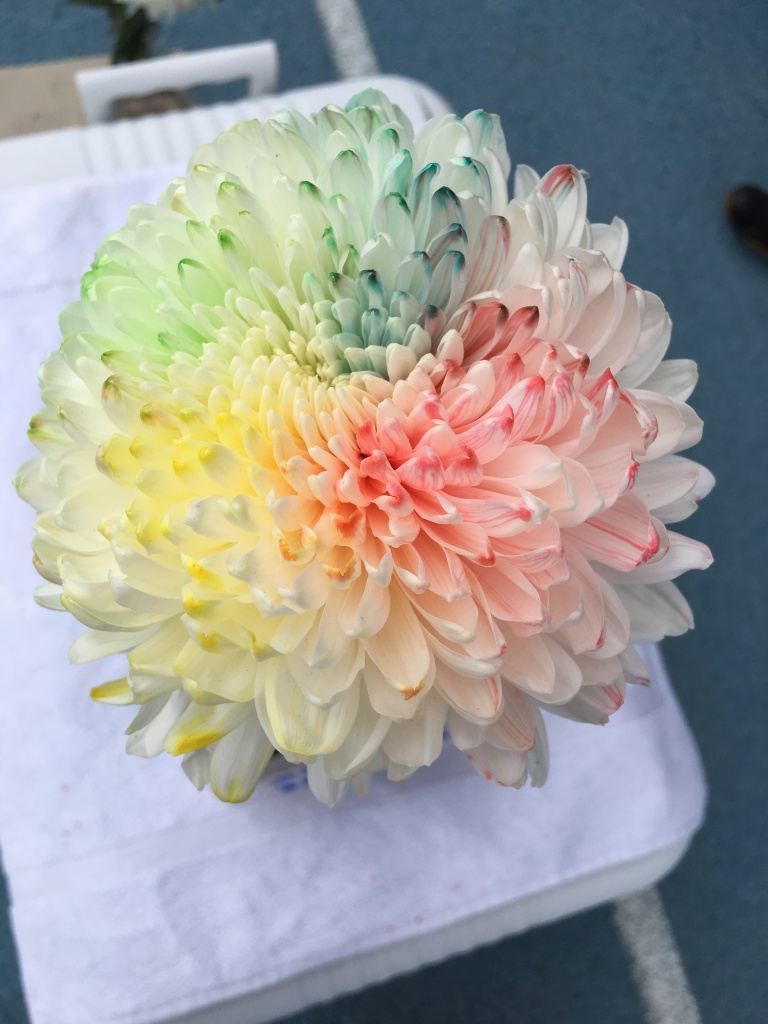
Tip: Almost any white flower will do, though some take up colours faster than others. You could try a flower race and see which of the white flowers in your garden are the thirstiest!
How does it work?
Through a process called transpiration, water evaporates from small pores in the flower’s leaves and petals. To replenish that lost moisture, the vascular system transports water and nutrients up the stem and into the rest of the flower.
(Humans have a vascular system too! It is made up of our veins and arteries and transports blood around our bodies. The blood carries oxygen, which keeps us alive.)
By putting food colouring in the water used to replenish moisture in a white flower, we can change the colour of the flower. By splitting the flower’s stem, and putting each part of the stem into a different colour of water, we can make multicoloured flowers.